*The contents of this article are human-created.*
This post may contain affiliate links. Please see our full disclosure for details.
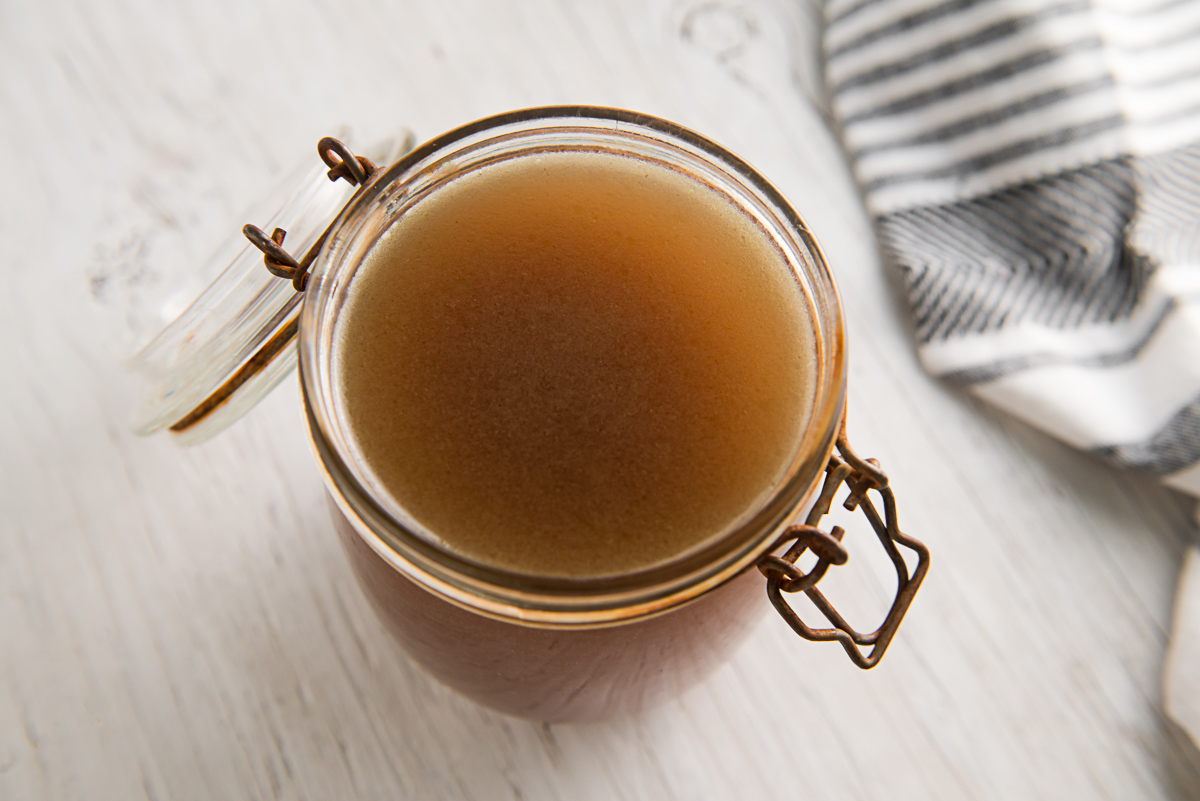
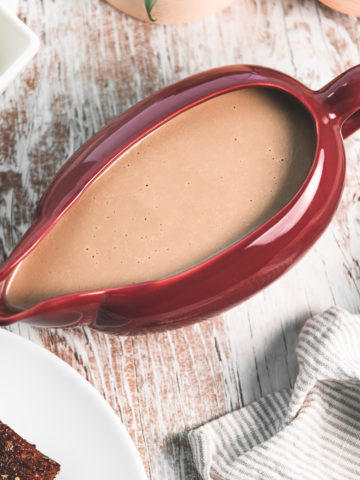
Learn how to make Homemade Vegetable Broth from kitchen scraps! It's an easy, budget-friendly, and waste-reducing way to make nourishing broth with real food ingredients.
Making homemade Vegetable Broth is a great way to know and control exactly what goes in it.
While convenient, many store-bought broths are full of additives like artificial colours, sugars and too much salt. Many are also made with dried powders and artificial flavours instead of fresh ingredients.
Is Homemade Vegetable Scrap Broth Healthy?
Saving your fresh vegetable scraps is a great way to make nourishing broth with whole food ingredients without breaking the bank.
Health Benefits
Rich in vitamins and minerals. Vegetable broth is a great source of many vitamins and minerals. They can vary depending on what vegetable scraps you use. However, most are good sources of magnesium, calcium, potassium, iron, vitamins A, C, K and folate.
Immune-supporting. Vegetable broth is full of nutrients and warmth that can help to keep us healthy and combat seasonal colds.
Antioxidant-rich. Homemade vegetable broth is an excellent source of antioxidants that can protect against cell damage and inflammation.
Supports digestion and gut health. Full of prebiotic fibre, quercitin and other anti-inflammatory flavonoids, vegetable broth is a great way to support the microbiome. It also promotes healthy digestion and nutrient absorption.
Seasonal Benefits
Autumn and winter are great times to support the immune system with the richness of vitamins, minerals and antioxidants vegetable broth can provide. It's also perfect for making warming soups and hearty casseroles.
Spring and summer are great times to stash away fresh vegetable scraps for the winter months. They're also great times to use vegetable broth to cook rice or quinoa, adding a nourishing touch to lighter meals like grain bowls and salads.
Saving Vegetable Scraps for Broth
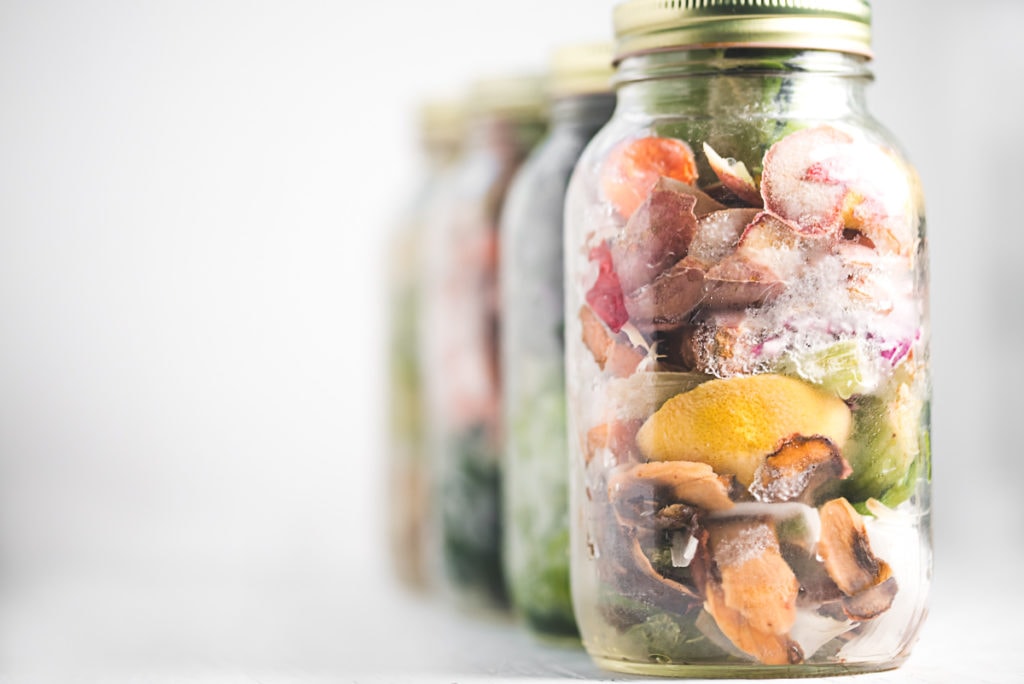
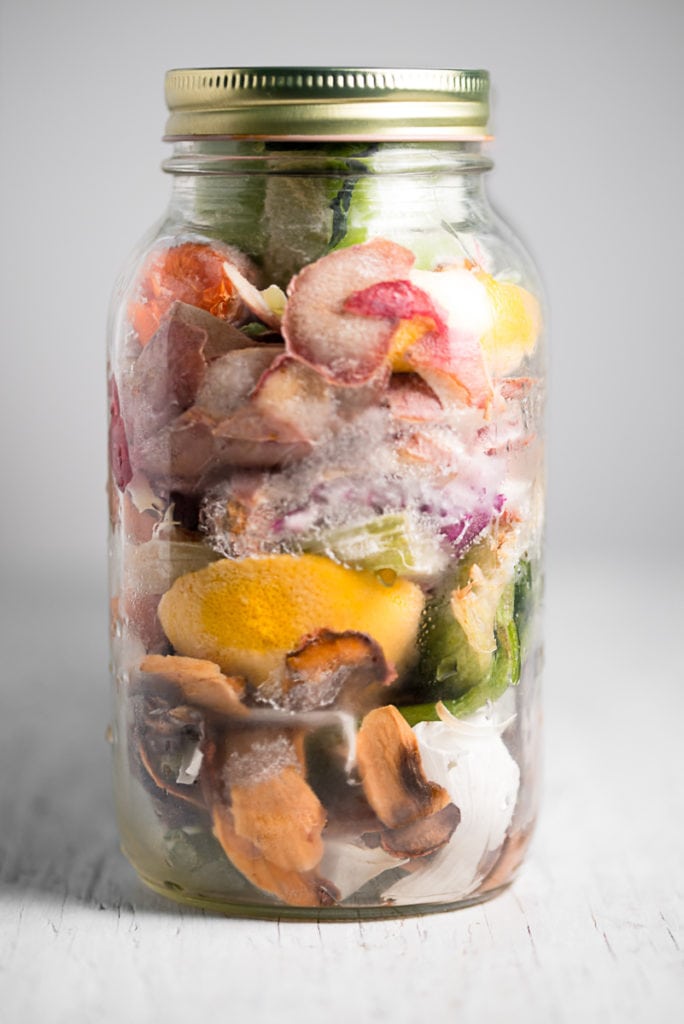
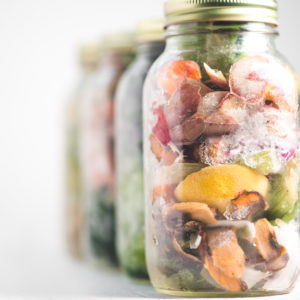
The best and easiest way to save vegetable scraps for broth is to freeze them. You can simply store away bits and ends whenever chopping fresh veggies until you have a stash saved up. That way, they are there and ready when you need to make a batch of broth.
What Vegetable Scraps Are Good For Stock?
There are so many vegetable scraps you can save for stock! From stems and trimmings to skins and rinds, there are plenty of kitchen scraps you can save! I also make sure what I save is either homegrown or organic.
Certain scraps, such as herbs and citrus rinds, can have an overpowering flavour, so you may want to save them separately to use in smaller quantities.
The Best Vegetable Scraps to Save
- Celery ends and leaves are one of my favourite vegetable scraps to save for broth. They offer a subtle flavour with plenty of natural salt, giving broth that traditional flavour most of us are used to.
- Organic garlic and onion Skins are a great way to add a subtle depth of umami flavour to your broth.
- Garlic and onion ends are a great way to add a fuller depth of umami flavour to your broth. You can even sauté them before boiling as you would with chopped onion and garlic.
- Organic carrot shavings and trimmings are great for adding to your broth. They can add a richness of flavour and natural sugars that don't overpower.
- Mushroom stems and shavings are wonderful for adding a richness of umami flavour. I always make sure I have some stashed in the freezer for broth.
- Organic turmeric and ginger shavings are great for adding an anti-inflammatory and tummy-soothing touch to your broth. I love keeping some in the freezer for when a cold or flu strikes. Unless you add a heap load, they add a very subtle peppery and warming flavour to your broth. I especially love adding them to homemade chicken broth.
Vegetable Scraps to Use in Moderation
While these are all still great scraps to save and use for broth, they are best used in smaller amounts or avoided if you plan to simmer your broth for more than an hour.
- Lemon and lime rinds are great for adding zesty and refreshing notes to your broth. However, they can become very overpowering and quite bitter if too many are added or if simmered for too long.
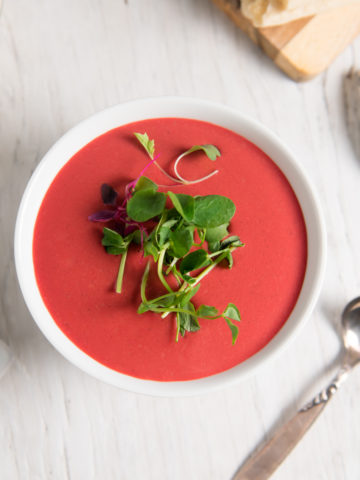
- Beet shavings and trimmings add a nourishing touch to homemade broth. They also add a yummy, earthy flavour with a touch of natural sweetness. I should note that they will turn your broth deep red or purple depending on the other ingredients included.
- Beet stems and greens are another favourite of mine. They are less bitter than some greens and add a plethora of vitamins, minerals and antioxidants. However, the stems can also give your broth a red or purple tint.
- Broccoli and kale stems are great if you don't simmer your broth for too long. They are a great way to add a punch of flavour, but they can become quite bitter if too much is added or simmered for longer than an hour.
- Greens and herbs are another great option for creating a more flavourful broth. However, like lemon and lime rinds, they can overpower if too much is added or simmered too long.
- Potato shavings can add a subtle earthy flavour that balances out the brighter flavours. However, they are quite starchy and can also turn bitter if simmered for too long.
- Radish, turnip and parsnip shavings and trimmings can add a fresh, peppery flavour to your broth, but they are best added in small amounts. They are also rich in gut-loving prebiotic fibre.
Vegetable Scraps I Avoid Adding to Broth
- Anything mouldy or buggy. While stashing away veggies and herbs that are beginning to wilt is a great way to reduce food waste, it's best to toss anything that is mouldy or too far past its prime. It's also best to be on the safe side and toss anything that looks like it may be bug or worm-infested.
- Tomatoes don't freeze well because of their high water content. Plus, their skins and seeds are high in solanine (a nutrient inhibitor), so I tend to avoid saving these as scraps. They can also overpower the broth. So, when I want tomato soup, I just make it with fresh tomatoes.
- Peppers can overpower the broth's flavour, making it bitter (or spicey if they are hot peppers). If you want to add them, I recommend adding them towards the end for only 10 - 20 minutes. Leftover roasted peppers, on the other hand, can add a delicious flavour to your broth.
- Other cruciferous vegetables like brussel sprouts, cauliflower and cabbage can turn the broth quite bitter, so I tend to avoid using these ones.
- Squash shavings and ends I never save or use for broth. They aren't meant to be eaten and would likely add a very bitter flavour.
- Bitter greens like arugula, dandelion, turnip tops and carrot tops can overpower the broth, even in smaller amounts.
- Artichoke ends add a very bitter taste and are best tossed in the compost.
How to Store Vegetable Scraps for Broth
As mentioned above, freezing vegetable scraps is the best and safest way to save them for broth. Unless you cook commercially or have a very large family, it can take a while to save up enough scraps. So, they can spoil quickly if kept in the fridge. Freezing them while they're at their freshest is the best way to lock in precious nutrients.
I like to save mine in reused mason jars or freezer-safe glass containers to avoid plastic and save money. However, for ease, many readers have mentioned they like saving their scraps in bread bags or ziplock freezer bags.
How to Make Broth from Vegetable Scraps
Making homemade broth from vegetable scraps is simple to make and comes together in about an hour.
What You Will Need
Equipment
- Large stock pot for simmering the both. You can also use a pressure cooker, slow cooker or Instant Pot (the steps will vary depending on if you are using one of these specialty gadgets; see variations for specific instructions).
- Stovetop for heat. Unless you are using a slow cooker or Instapot.
- Colander or large strainer to strain out the vegetable scraps.
Ingredients
- Vegetable scraps give the broth its flavour and nutrients.
- Filtered water is best to avoid pollutants and chemicals that can become concentrated when boiling.
- Onion and garlic add a richer flavour. I like to sauté them before adding the scraps and water. However, if you have enough ends saved up, you can sauté them instead of using fresh chopped garlic and onion.
- Extra virgin olive oil to sauté the garlic and onion. It also adds a healthy fat that increases absorption of fat-soluble nutrients like vtiamins A and D. Pure cold-pressed avocado oil or unrefined coconut oil can also be used.
- Bay Leaves add an aromatic and uplifting flavour profile that can balance out the savoury flavours in vegetable broth.
- Natural mineral salt brings the flavours together, making the broth more palatable and helping to preserve it. If I will be using the broth right away, I often leave the salt out and add it right into the soup or dish I am making.
Step 1: Sauté
First, heat the olive oil in a large stock pot. Then, add the chopped onion and garlic and cook until fragrant. If you have enough, you can also use saved onion and garlic ends.
Step 2: Simmer
Add the vegetable scraps and bay leaves to the stock pot. Then, pour in the water. Use a wooden spoon to press down any bits and pieces that float to the top and stick out.
Cover and bring to a boil. Once boiling, reduce the heat and allow it to simmer for 30 minutes to one hour. If you like an extra strong broth, you can simmer for 2 - 3 hours.
Step 3: Strain
Once your broth has simmered for at least 30 minutes, remove it from the heat and allow it to cool before handling.
Once cool enough to handle, place a colander or large sieve over a large bowl. Pour the vegetable broth through to strain out the vegetable scraps.
Lift the colander and shake out any excess liquid (keeping it over the bowl). Once all the broth is strained out into the bowl, you can toss the scraps into the compost.
You can leave your broth unsalted or add salt and pepper to make it more palatable. Salt can also help to preserve it if you won't be using it all right away.
Storing and Saving
If you won't be using your broth right away, pour it into a clean, airtight container. I like using mason jars for easy pouring and because they fit nicely in the fridge. Allow it to cool fully before refrigerating or freezing.
Homemade vegetable broth will last up to 5 days in the fridge and 3 - 6 months in the freezer. If you are freezing it in glass containers or jars, do not fill them right to the top. Make sure to leave at least an inch of room from the lip of the jar to allow for expansion and avoid cracking.
Other Cooking Methods
Instant Pots are great for making quick batches of broth. To make this broth in an Instant Pot, first, simmer the garlic and onion on the sauté setting. Then add the scraps, water and bay leaves. Make sure not to fill the water past the max fill line. Secure the lid and turn the pressure gauge so it is closed. Press the soup/broth button and cook on high pressure for 20 - 40 minutes. Allow the cooking process to fully complete. Do not remove the lid until the pressure has fully released and the gauge has turned back to the open position. Do not force the gauge open, it will release on its own once completed. The steam is extremely hot, so be careful not to place your hands, arms, face or any other body parts over top while it is releasing.
Slow cookers are another way you can make this broth. You can sauté the onion and garlic on a low heat setting. Some also have a sauté setting. Then, add the scraps, bay leaves and water. Make sure not to fill past the max fill line. Cover with the lid and set to low heat. Allow it to cook for 1 - 2 hours.
Old-fashioned pressure cookers are similar to the Instant Pot but are placed on a stovetop. First, sauté the onion and garlic over low heat with the lid off. Then, add the scraps, bay leaves and water. Make sure not to overfill, leaving a couple of inches of room from the top. Secure the lid and simmer over low heat until the gauge begins to rattle and steam. Turn the heat off and allow the steam to release fully before removing the lid. Do not touch the gauge or remove the lid until the steam is fully released. Be careful not to place any body parts over the releasing steam, as it is extremely hot.
Substitutions and Variations
Make it oil-free by sautéing the onion and garlic in a tablespoon or two of water instead of olive oil.
Mix with fresh vegetables if you don't have enough scraps saved up or want to create broth with a specific flavour.
Add your scraps to bone broth to make a more nourishing and flavourful chicken or beef broth.
Add apple cider vinegar to give your broth more digestibility and a tangy zip of flavour. You usually only need 1 teaspoon - 1 tablespoon, depending on how much you're making.
Add coconut aminos to give your broth a naturally salty and umami flavour. This can also help to balance out any bitter flavours.
My Top Tips
Store certain scraps separately. I like keeping the scraps I use in moderation in separate containers so I can more easily control how much I add or leave them out if I want to avoid a specific flavour. I usually keep celery, carrot, mushroom, garlic, and onion scraps together as I use them the most, and they create the most classic veggie broth flavour.
Sauté the onion and garlic to add depth of flavour. Skipping this step can result in a blander or more bitter broth.
Simmer for 30 minutes to an hour for the best flavour. Unless you like a really intense flavour, I don't recommend simmering the broth for more than an hour.
Reduce bitterness by adding salt, apple cider vinegar, coconut aminos or a little splash of maple syrup.
Ways to Use Homemade Vegetable Stock
There are plenty of ways to use Homemade Vegetable Broth! It's a great way to add a nutritious and delicious touch to many meals and dishes. From scratch-made soups and casseroles to gravy and sauces, the options are endless. You can also use it instead of water to cook rice or quinoa.
My Favourite Vegetable Broth Recipes


Recipe Highlights
Waste-reducing. This recipe is a great way to reduce food waste. The cooked-down scraps are also a great addition to your compost pile for making your own soil!
Budget-friendly. Saving and using vegetable scraps is a great cost-effective way to make nourishing homemade broth with real food ingredients.
Nutrient-dense. Freezing fresh veggie scraps is a great way to lock in nutrients for a nourishing vitamin and mineral-rich broth.
Easy to make. Making homemade broth, especially with pre-cut scraps, shavings, bits, and ends, doesn't require much work or chopping. Plus, it can be made in less than one hour.
Friendly for most diets. This homemade vegetable broth is naturally gluten, dairy and nut-free. It can also be made without salt, making it suitable for many diets.
FAQs
Since this Stock is made with vegetable scraps, I wouldn't recommend reusing them. Whether using fresh or scraps, most of the nutrients get boiled out of the vegetables and into the broth. So they won't offer much nutritionally other than fibre. However, they make a great addition to your compost pile for making homemade soil!
Depending on the vegetable scraps you use and the intensity of flavour you desire, you can boil them for 30 minutes up to 4 hours. However, I tend to find the sweet spot is between 30 minutes and one hour. If using an Instant Pot, you can boil them for as little as 20 minutes.
When using a regular stock pot on the stove, I usually let mine simmer for around 30 - 45 minutes. If I use the Instant Pot, I will set the time to 40 minutes at the very most.
When using scraps for broth, I find that letting them boil for 2 - 4 hours can create a very intense flavour and cause the broth to turn very bitter. It's also important to note that the longer it is simmered in a regular stock pot, the more the water will evaporate. So, longer isn't always better.
Yes, Homemade Vegetable Broth does go bad. It will last up to 5 days if refrigerated in an airtight container. It can also last 3 - 6 months in freezer.
Homemade Vegetable Broth can be canned only if you have a properly calibrated pressure canner and very carefully follow pressure-canning instructions. Since it is a low-acid food, it cannot be water-bath canned.

If you make this Homemade Vegetable Scrap Broth, let me know how it turns out by leaving a comment and rating below! Also, make sure you're following along on Pinterest, Instagram and Facebook for more wildly nutritious recipes!
How to Make Homemade Vegetable Scrap Broth
Print RecipeEquipment
- Large Stock Pot
- Stovetop
- Colander or Large Strainer
- Large Bowl
Ingredients
- 2 cups Vegetable Scraps
- 4 - 5 cups Filtered Water (Some may Evaporate depending on the Pot and Lid)
- ¼ cup Onion (chopped)
- 1 tablespoon Garlic Cloves (minced)
- 2 tablespoon Extra Virgin Olive Oil (or Pure Cold-Pressed Avocado Oil)
- 2 Bay Leaves (Dried)
- ½ teaspoon Himalayan Salt (or other Natural Mineral Salt)
Instructions
- First, heat the olive oil in a large stock pot. Then, add the chopped onion and garlic and cook until fragrant. If you have enough, you can also use saved onion and garlic ends.
- Add the vegetable scraps and bay leaves to the stock pot. Then, pour in the water. Use a wooden spoon to press down any bits and pieces that float to the top and stick out.Cover and bring to a boil. Once boiling, reduce the heat and allow it to simmer for 30 minutes to one hour. If you like an extra strong broth, you can simmer for 2 - 3 hours.
- Once your broth has simmered for at least 30 minutes, remove it from the heat and allow it to cool before handling.Once cool enough to handle, place a colander or large sieve over a large bowl. Pour the vegetable broth through to strain out the vegetable scraps.Lift the colander and shake out any excess liquid (keeping it over the bowl). Once all the broth is strained out into the bowl, you can toss the scraps into the compost.You can leave your broth unsalted or add salt and pepper to make it more palatable. Salt can also help to preserve it if you won't be using it all right away.
- If you won't be using your broth right away, pour it into a clean, airtight container. I like using mason jars for easy pouring and because they fit nicely in the fridge. Allow it to cool fully before refrigerating or freezing.Homemade vegetable broth will last up to 5 days in the fridge and 3 - 6 months in the freezer. If you are freezing it in glass containers or jars, do not fill them right to the top. Make sure to leave at least an inch of room from the lip of the jar to allow for expansion and avoid cracking.

Susie says
Ive been saving vege scraps in the freezer to make into vege stock. Thanks for the recipe!
Michelle McCowan says
No problem, Susie! I hope you enjoy 🙂
Sally says
In my household of only two, it took a while to gather enough scraps in the freezer to try this approach - it's summer in Australia at the moment, so my stash might grow more quickly in the cooler months. The stock turned out really well, though, and I think that I'll commit to save all future vegetable scraps so that I'll always have nutritious home-made stock on hand. I used a plastic bread bag and twist tie in preference to a jar, to store the scraps in the freezer - easy and quick to add more scraps to, and then to transfer these to the stock pot when I was ready to make the stock. Thanks Michelle, for sharing this idea.
Michelle McCowan says
It took me a little while to save enough at first, too. That can be the most challenging part. But, if you do commit to saving all your future scraps, it shouldn't take too long to build up a continuous stash. I'm so happy to hear that the broth turned out well for you. Also, that's a great idea using a bread bag for more ease of use! Thanks so much commenting, Sally 🙂